Getting Started
This section provides information on how to install the Cisco Nexus 3550-T Programmable Switch Platform.
Package contents
The Nexus 3550-T box should contain the following items:
- Nexus 3550-T box
- Nexus 3550-T Chassis
- Rackmount kit
- 8x M6 rack-mounting nuts
- 8x M6 rack-mounting bolts
- 8x M6 rack-mounting washers
- 2x IEC power leads
- 1x Serial port adapter cable
- 2x Mounting extension rails
Already installed should also be:
- 2x Power supply modules
- 2x Fan modules
Note
The power supplies have an arrow on the exhaust fan that points in the direction of airflow. Fan modules are colored red for port-side intake and blue for port-side exhaust.
Mount the Cisco Nexus 3550-T Programmable Switch Platform
Since the power supplies and fans add significant weight to the Nexus 3550-T, We recommend that the system is rack mounted prior to installing them.
Note
You will require two people to complete the installation.
To mount the Nexus 3550-T, perform the following steps:
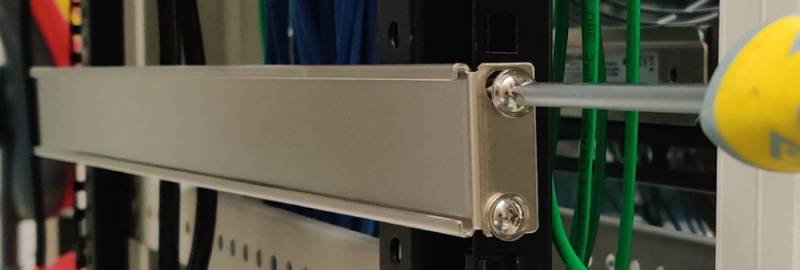
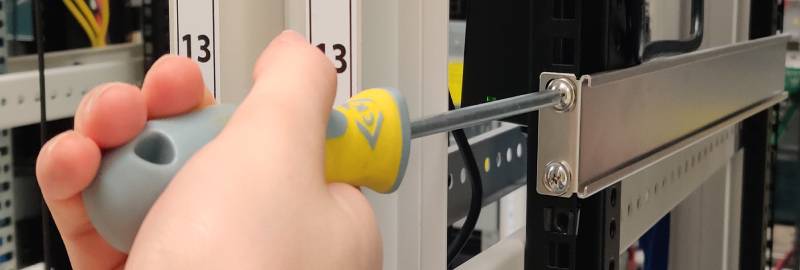
- Clip the supplied-mounting nuts into the rack as shown, noting the gap of one notch between the nuts.
- One person holds the Nexus 3550-T, aligning the front panel of the Nexus 3550-T with the nuts.
- The second person affixes the washers and bolts to each of the four mounting holds on the front panel of the Nexus 3550-T, securely fastening them to the nuts.
Mount the Cisco Nexus 3550-T Programmable Switch Platform with rear support rails
The Nexus 3550-T ships with rear support rails. You can add these rails to provide extra structural support for the rack system.
To mount the Nexus 3550-T with rear support rails, perform the following steps: 1. Fasten the rear rails at the desired height.
Attaching the right hand side rail.
Attaching the left hand side rail.
-
Lift the Nexus 3550-T to the desired height and align the installed rails with the rail mounting holes on the rear of the Nexus 3550-T.
-
Slowly rack the Nexus 3550-T by sliding back onto the rails, until the front is flush with the rack.
-
Fasten the Nexus 3550-T onto the rack as per the method for installing the front mount bolts. Due to the Nexus 3550-T's weight, the installation might be easier with the aid of another person.
Fasten the Nexus 3550-T in the normal manner.
Install the power supplies and fans
You can now install the power supplies and fans into the Nexus 3550-T chassis.
To install a fan module, perform the following steps:
- Note:** the position of the power connector on the fan module, relative to the power connector on the Nexus 3550-T. Rotate the fan module so that it aligns with the Nexus 3550-T connector.
- Push the fan module into the Nexus 3550-T until it is flush with the rear panel. The fan module will click into place when it is fully installed.
You can remove the fan module by pressing the release tab on the fan module.
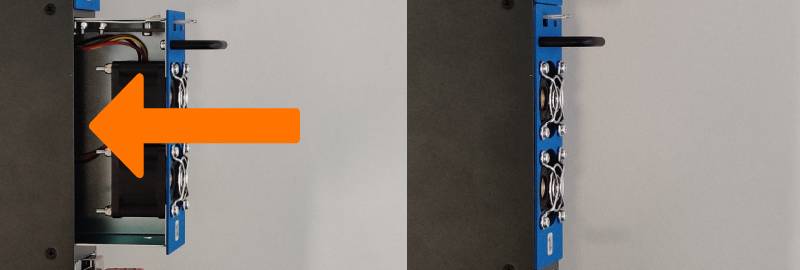
Installing a fan module
To install a power supply module, perform the following steps:
- The power supply orientation is the same for both left and right supplies. Note the position of the IEC power input, which should be on the right when viewed from the rear.
- Push the power supply module in until a click is heard. The quick release lever should now be engaged.
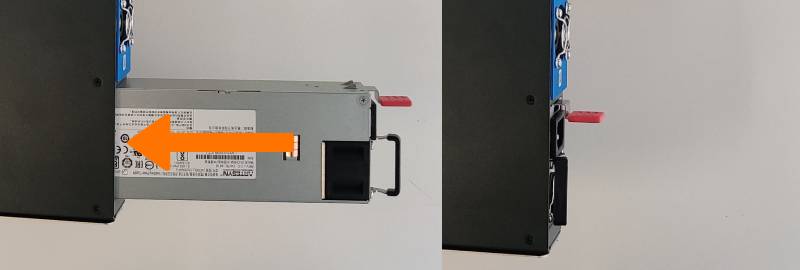
Installing a power supply
The Nexus 3550-T power supplies are redundant and failover from one to the other is automatic. We recommend you to operate the device with both power supplies installed, however, it will operate with only a single supply.
To remove a power supply module in the future, simply press the quick release lever whilst pulling on the removal handle on the rear of the supply
See Configuration for information on setting up the management interface of the Nexus 3550-T.
This page was last updated on Mar-23-2021.